I started playing around with the images i’ve scanned and with a little GIMP magic i was able to create a useful overlay image.
As you can see, the quality is not perfect, but still good enough to be very helpful in the reverse engineering process.
To get such images, i used the posterize function of GIMP to reduce the number of colors, and afterwards i set one color (black) to transparency.
As last step i colorized the remaining image and set the top layer to 60% transparency.
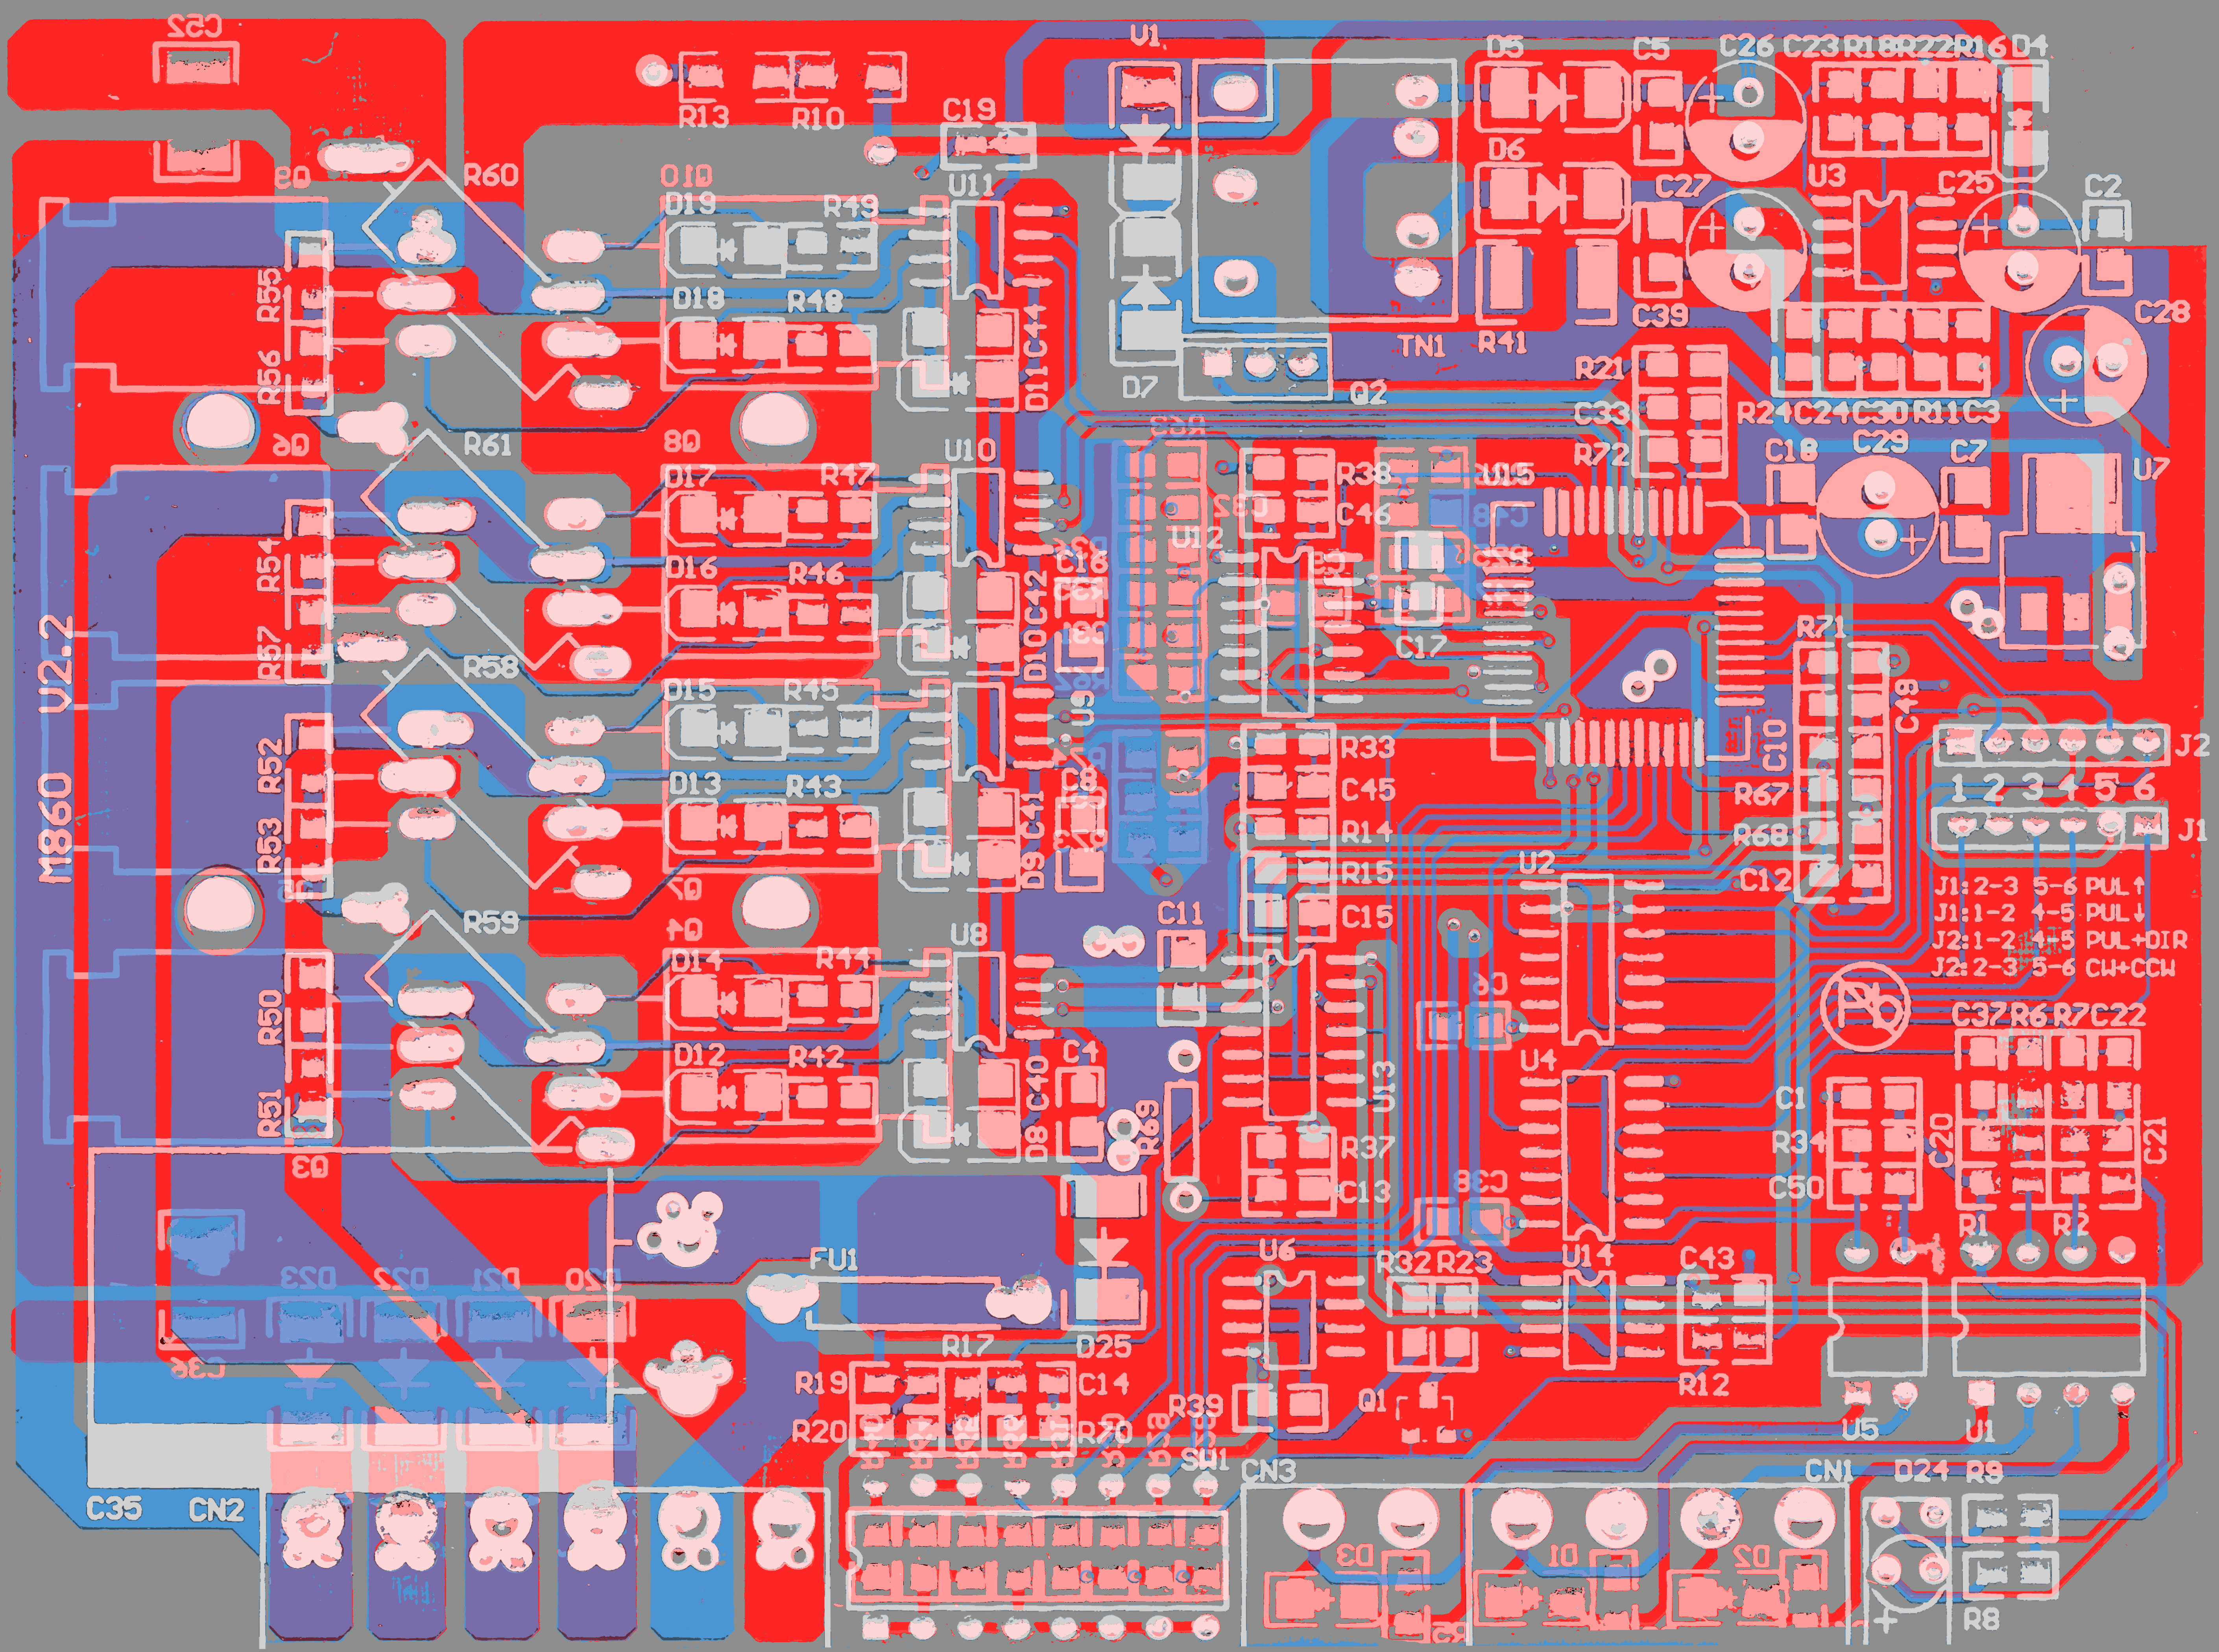
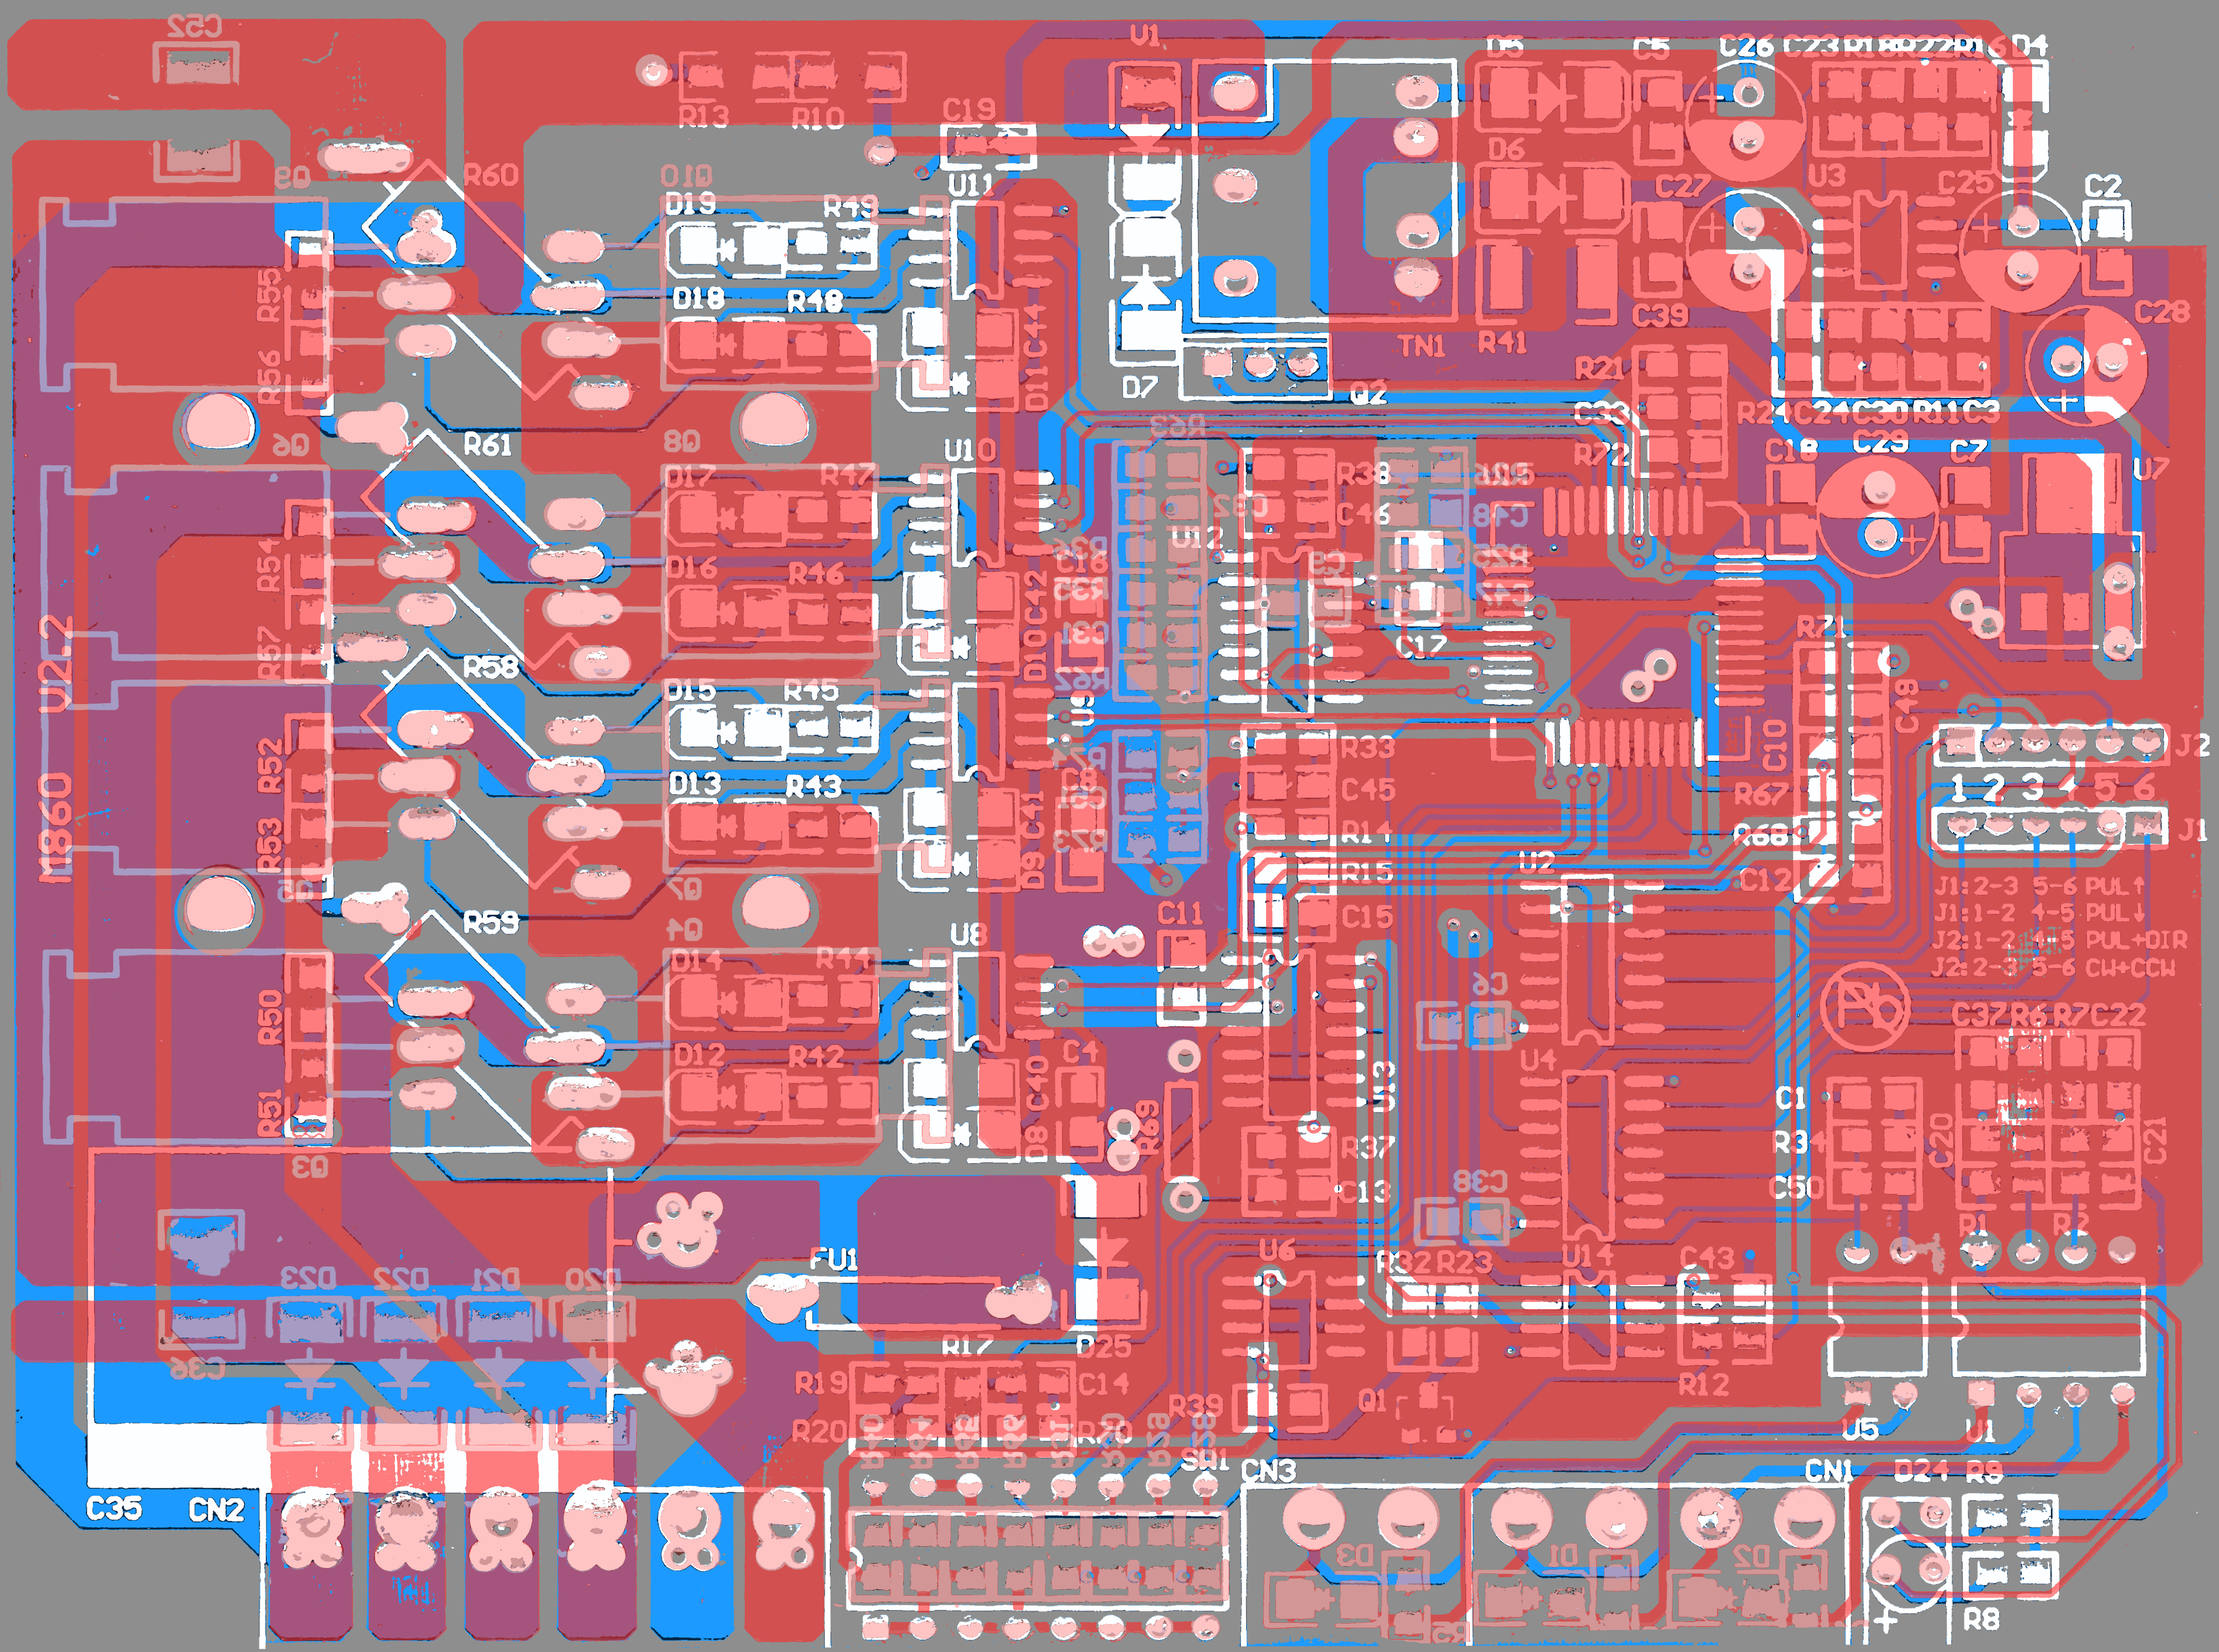
I still need to grind the top an bottom layers down to get a clear view of the inner layers, but before i do that i will try to get rid of the silk screen as well as the solder resist. If i can manage to do that i will get a nice copper only image. Maybe that is clearer than those two.