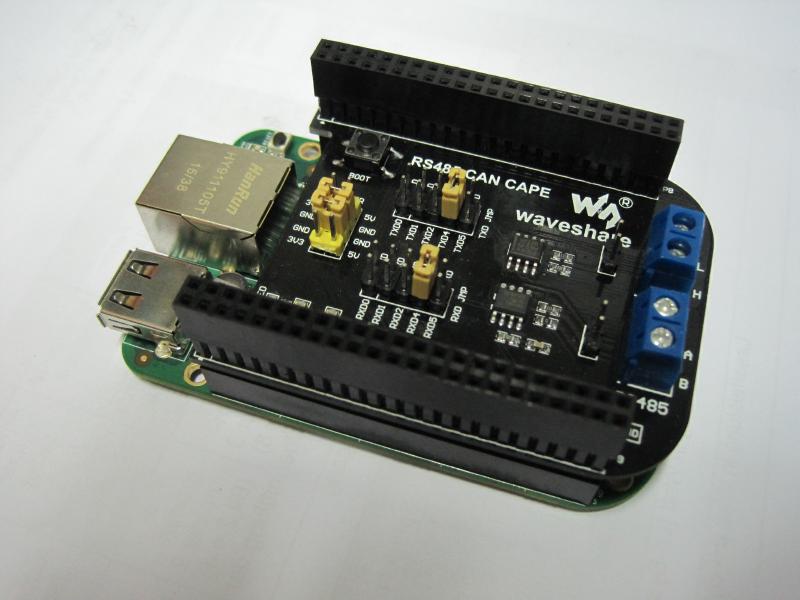
I want to build a Modbus TCP to Modbus RTU gateway using a BeagleBoneGreen and a WaveShare RS485 CAN CAPE . Unfortunately the documentation on the Waveshare Cape is really bad, so I will try to document here what steps were necessary to get the things up and running!

The hardware part 🔗
First of all, RS485 is slightly different from lets say RS232 because it is Half Duplex. That means that you can not send and receive at the same time. The physical connection between two bus devices is made by two differential wires. In order to be able to either receive or send, you need to tell the RS485 driver to switch between these modes (some drivers have auto sensing, but the one used on the Waveshare cape don’t have this feature).
And here begins the trouble. The and documentation and the diagram on the product page only mention a so called “RS485 transceiver enable jumper” that gives you the choice between either receive or send mode. Nowhere is documented that an GPIO pin is wired to the RE/DE pins of the driver IC, except on this schematic I’ve found after a long search.
In the first place I wired a GPIO Pin to the RSE header using a jumper wire and after that worked I soldered a wire in, just to see at a second closer look in the schematic that there is already a not documented connection in place! (ironically the same GPIO pin I connected :-) )
In the
schematic
you can see that header P9 Pin 42 is connected via an 0R resistor to the RSE signal. The RSE signal is connected to RE and DE. According to this
document
P9 pin 42 is GPIO7.
The software part 🔗
My knowledge of the inner working of linux is unfortunately very limited, but anyway I need to get this thing to work.
So I read a lot of post in online forums and the most posts indicated that there is no support for RS485 in the kernel and manually patching and building a kernel ist necessary, but that information is old and NOT TRUE!
As of kernel 3.8.13-bone39 a patch from Michael Musset enables the use of a GPIO pin for switching sending and receiving. Thank you so much Michael!
A lot of places suggested to use UART4 and I thought it might be a good idea to do so because I had no idea if another UART would work as well. So I set the jumpers to UART4, for both RX and TX.
But UART4 is not active by default and I had to activate it by editing /boot/uEnv.txt:
1cape_enable=capemgr.enable_partno=BB-UART4
Thankfully I stumbled upon the very nice and detailed blog post of logicsupply . They sell their own RS485 cape, but unfortunately I already had the waveshare cape and wanted to stay with it.
But the hardware doesn’t matter so much, and so I made use of their code and modified it slightly for my purposes:
 1import serial, fcntl, struct
 2
 3s = serial.Serial(
 4    port='/dev/ttyO4',
 5    baudrate=19200,
 6    parity=serial.PARITY_EVEN,
 7    stopbits=serial.STOPBITS_ONE,
 8    bytesize=serial.EIGHTBITS
 9)
10
11# -- Begin of setup procedure --
12# Standard Linux RS485 ioctl:
13TIOCSRS485 = 0x542F
14
15RS485_FLAGS = 0x21 # enable RS485 and use GPIO for RE/DE control
16
17RS485_GPIO_PIN = 7
18
19# Pack the config into 8 consecutive unsigned 32-bit values:
20serial_rs485 = struct.pack('IIIIIIII',
21                           RS485_FLAGS,        # config flags
22                           0,                  # delay in us before send
23                           0,                  # delay in us after send
24                           RS485_GPIO_PIN,     # the pin number used for DE/RE
25                           0, 0, 0, 0          # padding - space for more values
26                           )
27
28# Apply the ioctl to the open ttyO4 file descriptor:
29fd=s.fileno()
30fcntl.ioctl(fd, TIOCSRS485, serial_rs485)
31# -- End of setup procedure --
32
33# send a simple message
34s.write("Hello, world!")
35
36# print all data coming back
37while True:
38    if s.inWaiting():
39        print(s.read())
40
41# will never be reached
42s.close()
The part marked with begin and end of setup procedure need only to be executed one time, after that you can simply write/read to/from the serial device and everything works fine!
I will use the BBG + Cape to build my own Mdobus TCP to Modbus RTU gateway. The reason is that I have a central ventilation system in my house that has only Modbus RTU. I want control it via my home automation system that only has Modbus TCP (I could buy a Modbus RTU extension, but the charge 150€ for that, which is a lot of money).
As soon as I have first results, I will write up another blog post with details.