I tried for quite some time to get a reliable and safe Site-to-Site VPN between two locations but never figured it out completely. Site A runs on a Mikrotik hAP ac as its router, Site B runs on a FRITZ!Box 7530 AX. Since RouterOS v7 Wireguard is supported as an official VPN solution, for the Fritzbox Wireguard is supported since FRITZ!OS 7.50. I wanted a real Site-to-Site VPN so that I can access devices on the other site from both sites.
Turns out that is not so easy to achieve as the Fritzbox is a bit weird and does not allow to modify config values after a config is uploaded.
I ended up setting up the Mikrotik router as the server and the Fritzbox as the client.
Step 1 - Mikrotik public key 🔗
I start with adding a Wireguard interface on the Mikrotik
1/interface wireguard add name=fritzbox-wg listen-port=51820 comment="Wireguard Site-to-Site to FritzBox"
Now we need to get the public key of the Mikrotik
1/interface/wireguard/print
2
3Flags: X - DISABLED; R - RUNNING
4 0  R ;;; Wireguard Site-to-Site to FritzBox
5      name="fritzbox-wg" mtu=1420 listen-port=51820 public-key="ZHbjLKhWCsFJwfaLwJFzYY+q4HC7HFlP7GVXfj2NKTk="
Here we see that the Mikrotiks public key is ZHbjLKhWCsFJwfaLwJFzYY+q4HC7HFlP7GVXfj2NKTk=
Step 2 - Config file for the Fritzbox 🔗
We create a config file and call it fritzbox.conf for example that looks like this:
 1[Interface]
 2PrivateKey = <fritzbox_private_key>
 3DNS = 192.168.88.1
 4
 5[Peer]
 6PublicKey = <mikrotik_public_key>
 7PresharedKey = <psk>
 8AllowedIPs = 10.0.0.1/24, 192.168.88.0/24
 9Endpoint = <mikrotik_public_ip_or_dns>:<mikrotik_wireguard_port>
10PersistentKeepalive = 25
We need to generate keys for the Fritzbox, therefore we run wg genkey on a linux machine and get something like gMt66o631A3Z0nZYoCEHwSt2edA0mkbH6Q3lOfLVNFw=.
If the wg command is not found you need to install wireguard-tools, at least thats what the package is called on Arch linux.
Next we need to generate the public key for the Fritzbox like this echo "gMt66o631A3Z0nZYoCEHwSt2edA0mkbH6Q3lOfLVNFw=" | wg pubkey and get iX7yZ1SR1r8i2+DiUzh4hMDOVEGNHtX9bSluuGnRp0E=.
Now we need to generate a pre-shared key with wg genpsk, that gives us 3LPRiA4G7Cjiov5oHCry+avYLmEwUtFsyRUIEYOVkv0=.
With these two keys we can fill in the config file:
 1[Interface]
 2PrivateKey = gMt66o631A3Z0nZYoCEHwSt2edA0mkbH6Q3lOfLVNFw=
 3DNS = 192.168.88.1
 4
 5[Peer]
 6PublicKey = ZHbjLKhWCsFJwfaLwJFzYY+q4HC7HFlP7GVXfj2NKTk=
 7PresharedKey = 3LPRiA4G7Cjiov5oHCry+avYLmEwUtFsyRUIEYOVkv0=
 8AllowedIPs = 10.0.0.0/24, 192.168.88.0/24
 9Endpoint = site-a.mytld.de:51820
10PersistentKeepalive = 25
A few side notes, 192.168.88.1 is the IP of the Mikrotik Router, so I added this as DNS to the config file. With this the local DNS entries from the Mikrotik side resolve on the Fritzbox side.
10.0.0.0/24 is the tunnel IP range, 192.168.88.0/24 is the IP range on the Mikrotik side. site-a.mytld.de is a DNS entry (or a dynDNS entry) pointing to the public IP of the Mikrotik router. 51820 is the Port we use, that must match what we used in Step 1 when we created the Wireguard interface.
Important
Step 3 - Mikrotik configuration 🔗
Now we add the Fritzbox as a peer
1/interface wireguard peers add interface="fritzbox-wg" \
2  public-key="iX7yZ1SR1r8i2+DiUzh4hMDOVEGNHtX9bSluuGnRp0E=" \
3  preshared-key="3LPRiA4G7Cjiov5oHCry+avYLmEwUtFsyRUIEYOVkv0=" \
4  allowed-address=10.0.0.0/24,192.168.178.0/24 \
5  persistent-keepalive=25s \
6  comment="FritzBox Site-B"
I assume that the Fritzbox IP range is 192.168.178.0/24, 10.0.0.0/24 is the tunnel IP range.
Next we add a route to the Fritzbox LAN
1/ip route add dst-address=192.168.178.0/24 \
2  gateway="fritzbox-wg" comment="FritzBox Site-B LAN"
Now we add a few Firewall rules, first one for the traffic from the Mikrotik to the Fritzbox
1/ip firewall filter add chain=forward action=accept \
2  src-address=192.168.88.0/24 dst-address=192.168.178.0/24 \
3  comment="VPN Forward to FritzBox Site-B" \
4  place-before=0
And another one for the direction of the Fritzbox towards the Mikrotik
1/ip firewall filter add \
2  chain=forward action=accept \
3  src-address=192.168.178.0/24 dst-address=192.168.88.0/24 \
4  comment="VPN Forward from FritzBox Site-B" \
5  place-before=0
Step 4 - Upload config to the Fritzbox 🔗
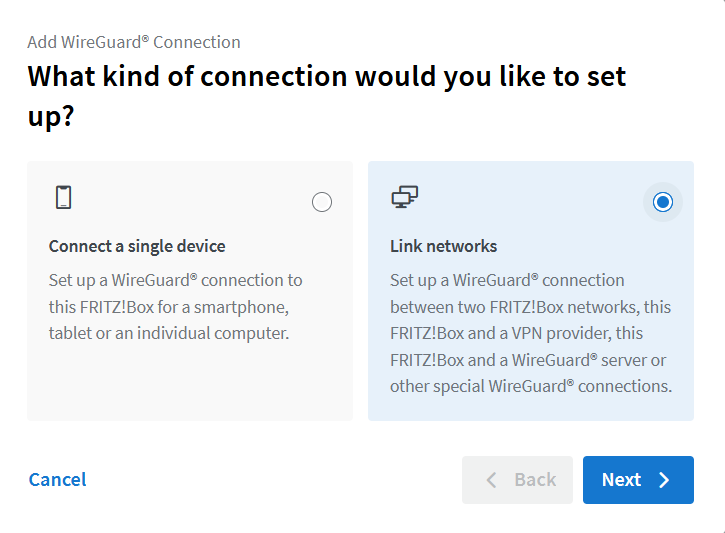
First go to Internet > Permit Access > VPN (WireGuard®) and click on Add WireGuard® Connection.
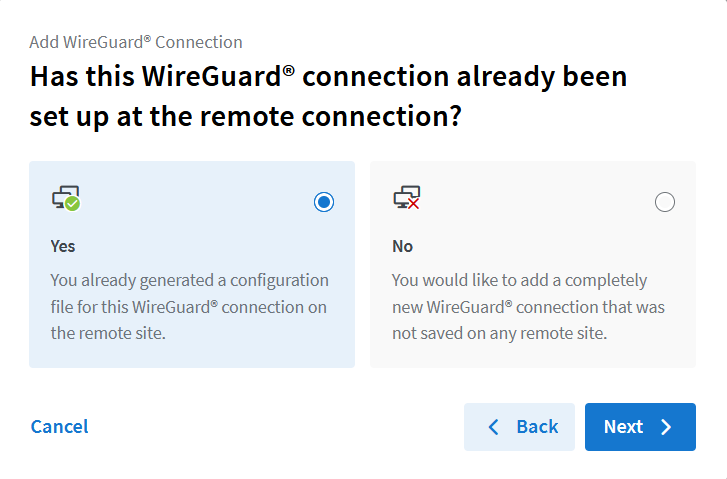
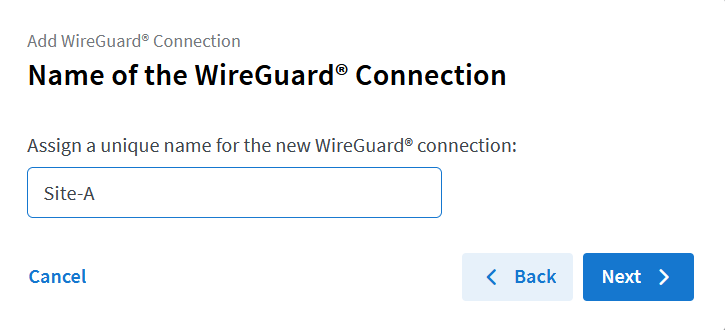
Select the options as shown in the following screenshots.

Here you select the config file that we created earlier

Allow NetBIOS over this connection is optional but I read that it is useful with Windows Clients
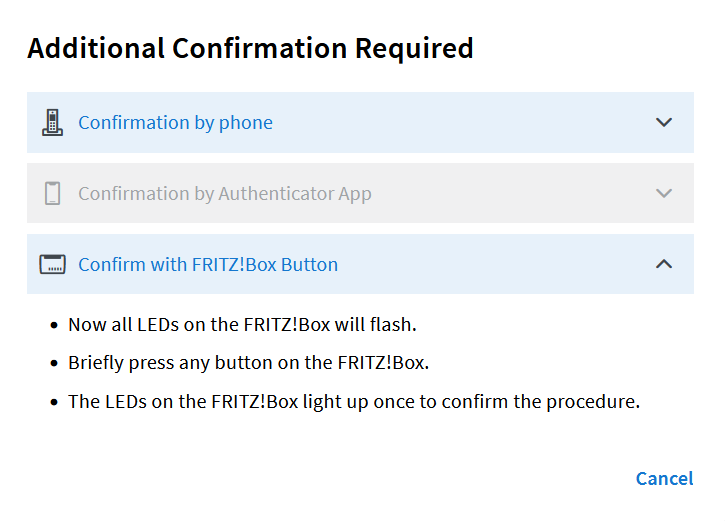
After that you should see that the indicator for the new Wireguard connection on the Fritzbox turns green after a few seconds.
Disclaimer 🔗
I’m a novice when it comes to networking, Wireguard, routing and so on, so I’m more than happy that I got it working in the end.
If you find an error or have a suggestion for improvement, let me know!